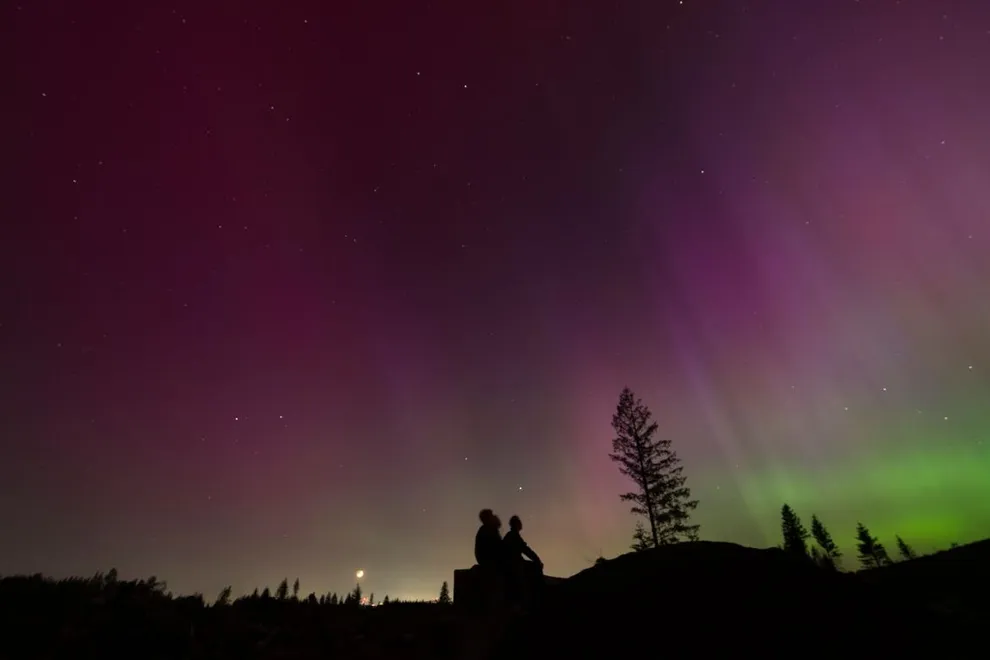
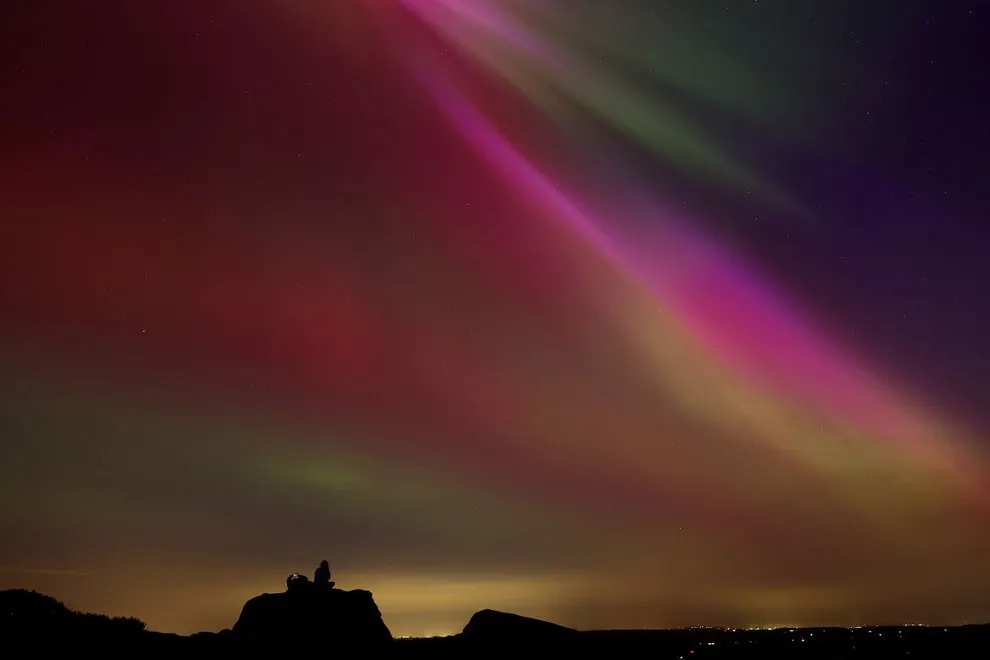
Have you ever dreamed of witnessing the magical dance of colorful ribbons across the night sky? The aurora, also known as the Northern Lights (Aurora Borealis) in the Northern Hemisphere, is a breathtaking natural phenomenon that every travel and photography enthusiast longs to experience. Recently, a powerful solar storm created an unprecedented aurora display, visible even at lower latitudes like Oregon, USA. This event ignited the passion for aurora “hunting” in many people. So, how can you capture stunning aurora photos in Oregon? This article will share the most helpful tips and secrets to make your aurora photography dreams a reality.
Why Oregon is an Ideal Destination for Aurora Photography
Oregon, a state in the Pacific Northwest region of the United States, isn’t the first place that comes to mind when thinking about the aurora. However, thanks to its geography and unique natural conditions, Oregon holds great potential for witnessing and capturing memorable aurora moments.
One of the most crucial factors for aurora viewing is low light pollution. Oregon boasts numerous wilderness areas, especially in rural regions and high-altitude mountain areas, where artificial light minimally impacts the night sky. This creates ideal conditions for clearly and sharply seeing the shimmering aurora displays.
Furthermore, Oregon is blessed with diverse and stunning landscapes. From the majestic Pacific coastline and snow-capped volcanic mountains to pristine blue lakes and vast pine forests, Oregon offers countless unique background options for your aurora photos. Imagine the vibrant aurora reflections on the tranquil surface of Crater Lake, or dancing above the magnificent basalt cliffs of the Oregon Coast – these would be true works of art.
The recent aurora event, visible in Oregon, proved that this state can indeed be an attractive destination for aurora photography, especially during strong solar storms.
Best Time to See the Aurora in Oregon
To increase your chances of successfully photographing the aurora in Oregon, choosing the right time is crucial. Here are the factors you need to consider:
Season: Winter is the best time to see the aurora in Oregon. From September to April, nights are longer, it gets dark earlier, and the probability of aurora appearances is higher. In particular, December, January, and February are often considered the peak aurora season.
Time of Night: The aurora is usually most intense between late night and early morning, typically from around 10 PM to 3 AM. However, the timing can vary depending on solar activity.
Aurora Forecast: Before heading out, remember to check the aurora forecast. Websites and apps like the NOAA Space Weather Prediction Center or SpaceWeatherLive provide information about the KP index (a measure of geomagnetic activity) and aurora visibility predictions. The higher the KP index, the greater the chance of seeing the aurora.
Weather Conditions: A clear, cloudless sky is essential for aurora viewing. Monitor the weather forecast and choose nights with clear skies. Avoid nights with a full or nearly full moon, as moonlight can reduce the contrast of the aurora.

Preparing Your Aurora Photography Gear
To capture high-quality aurora photos, preparing the right equipment is essential. Here’s a list of important gear you should bring:
Camera: A DSLR or mirrorless camera with good low-light performance is the top choice. Cameras with larger sensors (full-frame or APS-C) generally produce better image quality in night photography.
Lens: A wide-angle lens with a large aperture (f/2.8 or wider) is ideal for aurora photography. A wide-angle lens allows you to capture the vast expanse of the sky and encompass the entire aurora display. A large aperture lets your camera gather more light, helping you capture bright and clear photos in low-light conditions. Lenses with focal lengths from 14mm to 24mm are popular choices.
Tripod: A sturdy tripod is indispensable for long-exposure night photography. A tripod keeps your camera stable, preventing blur and allowing you to capture sharp images.
Remote Shutter Release: A remote shutter release or cable release allows you to take photos without directly touching the camera, minimizing vibrations and ensuring blur-free images.
Spare Batteries and Memory Cards: Cold temperatures can reduce camera battery life, so bring fully charged spare batteries. Memory cards are also crucial, especially if you’re shooting in RAW format. Carry spare memory cards so you don’t miss any moments.
Warm Clothing: Nighttime weather in Oregon, especially in winter, can be very cold. Prepare warm, layered clothing, including a thick jacket, hat, gloves, and scarf. Staying warm not only makes your photography experience more comfortable but also ensures your health.
Flashlight or Headlamp: A flashlight or headlamp is necessary for safely navigating in the dark and operating your camera. Use a red light flashlight to avoid affecting your and others’ night vision.
Camera Settings for Aurora Photography
Proper camera settings are key to capturing stunning aurora photos. Here are some settings you should consider:
Shooting Mode: Choose Manual (M) mode to have full control over exposure settings.
Aperture: Open the aperture to the widest possible (e.g., f/2.8, f/1.8, f/1.4) to gather the most light.
Shutter Speed: Start with a shutter speed of 15-30 seconds. The shutter speed needs to be adjusted depending on the aurora’s brightness and the desired image brightness. If the aurora is very bright, you can reduce the shutter speed to 5-10 seconds. If the aurora is faint, you can increase it to 30 seconds or even longer. However, excessively long shutter speeds can blur the aurora’s details due to movement.
ISO: Begin with ISO 800-3200. ISO also needs to be adjusted based on the aurora’s brightness and your camera’s acceptable noise level. Higher ISO makes the image brighter, but it can also introduce more noise. Find a balance between brightness and noise.
Focus: Switch to Manual Focus (MF) mode and focus at infinity. In the dark, cameras often struggle to autofocus accurately. Focusing at infinity ensures that stars and the aurora are sharp. You can use the Live View feature and zoom in to maximum magnification for more precise focusing.
White Balance: Select Daylight or Tungsten white balance. Daylight white balance usually yields the most natural colors. You can also shoot in Auto white balance and adjust it later in post-processing.
Image Format: Shoot in RAW format. RAW format stores more information than JPEG, giving you more flexibility for editing and recovering details during post-processing.
Best Aurora Photography Locations in Oregon
Oregon has many fantastic locations for aurora photography. Here are some suggestions:
Crater Lake National Park: Crater Lake National Park, famous for its pristine beauty and clear night skies, is one of the best places in Oregon to witness and photograph the aurora.
Central Oregon High Desert: The high desert region in Central Oregon has extremely low light pollution and diverse landscapes, including volcanoes, canyons, and grasslands. Areas around Bend, Prineville, and Burns are potential destinations.
Oregon Coast: The Oregon Coast, especially the North Coast region, can also be a good location for aurora hunting, particularly when the aurora is strong and extends southward. Find secluded beaches away from major cities to minimize light pollution.
Steens Mountain: Steens Mountain in southeastern Oregon is a remote area with high elevation and incredibly dark night skies. It’s an ideal location for those seeking an off-the-beaten-path aurora photography experience.
When choosing a location, prioritize places with wide, unobstructed views, free from trees or hills, and far from residential areas to avoid light pollution. Research light pollution maps beforehand and choose dark-colored areas (low light pollution) to increase your chances of success.

Tips for Stunning Aurora Photos
To enhance the quality of your aurora photos, apply these tips:
Find an Engaging Foreground: A beautiful aurora photo needs not only a vibrant sky but also an interesting foreground. Look for elements like trees, mountains, lakes, rocks, or architectural structures to create a focal point and depth in your image.
Use Aurora Forecast Apps: Aurora forecast apps help you track the KP index, best viewing times, and locations. Some popular apps include Aurora Forecast, My Aurora Forecast & Alerts, and SpaceWeatherLive.
Arrive Early and Prepare Thoroughly: Arrive at your shooting location before it gets completely dark to have time to familiarize yourself with the area, find good compositions, and set up your camera. Thorough preparation prevents you from feeling overwhelmed and flustered when the aurora appears.
Be Patient: Aurora hunting requires patience. The aurora may not appear immediately or may be faint at first. Be patient and keep observing the sky. Sometimes, the most spectacular aurora displays occur at unexpected moments.
Experiment with Different Settings: Don’t hesitate to experiment with different camera settings to find the parameters that best suit the lighting conditions and aurora intensity. Change shutter speed, ISO, and aperture to create different effects.
Check the Histogram: The histogram helps you check the exposure of your image. Ensure that the histogram is not too “clipped highlights” or “clipped shadows.”
Post-Process Your Photos: Post-processing is an important step in finalizing your aurora photos. Use photo editing software like Adobe Lightroom or Photoshop to adjust white balance, increase contrast, reduce noise, and enhance the aurora’s colors.
Important Reminders for Aurora Hunting
Finally, remember these important reminders for a safe and successful aurora photography trip:
Safety First: Always prioritize safety. Nighttime aurora hunting can pose risks like getting lost, encountering wildlife, or experiencing bad weather. Go with friends or family, inform someone about your plans, and carry a fully charged cell phone.
Respect Nature: When visiting natural areas, respect the environment and leave no trace. Pack out your trash and follow area regulations.
Respect Wildlife: Avoid disturbing or harming wildlife. Do not feed animals and maintain a safe distance.
Check Weather and Road Conditions: Before you go, carefully check the weather forecast and road conditions. Weather can change rapidly in mountainous areas, and roads may be icy or slippery in winter.
Aurora photography is a unique and challenging travel experience. With thorough preparation, knowledge, and a bit of luck, you can capture stunning aurora moments in Oregon and bring home photos to last a lifetime. Wishing you a successful and memorable aurora hunting trip!